How to Create Shareable eLearning Lessons with a Free AI Tool for Beginners
Shareable eLearning lessons benefit both creators and learners: creators gain wider reach and cost-effective scalability, while learners enjoy accessible, flexible, and convenient learning anytime, anywhere. This fosters knowledge sharing and enhances learning outcomes. Creating engaging eLearning lessons can feel overwhelming, but it doesn’t have to be. In this post, we’ll show you how to create shareable eLearning lessons using a fantastic free tool called uPresenter. To the end of this article, you’ll know all necessary steps to create start to finish.
What is uPresenter?
uPresenter is an AI-powered presentation tool designed to help users create professional slides quickly and efficiently. It automates the process of generating presentation content, making it ideal for students, educators, and professionals who need to create shareable eLearning lessons with minimal effort.
Key features of uPresenter:
- AI-generated slides: Instantly create well-structured slides based on input topics.
- Quiz creation: Generates quizzes from presentations for interactive learning.
- Result tracking: Create detailed reports to track learner progress in real-time.
- Multimedia integration: Supports text, images, and other media for engaging presentations.
How to Create Shareable eLearning Lessons in uPresenter?
Create an Account
First, head over to https://upresenter.ai/. You’ll need to create an account or log in if you already have one. The process is quick and easy.
Create Shareable eLearning Lessons
Once you’re in the uPresenter workspace, follow these steps:
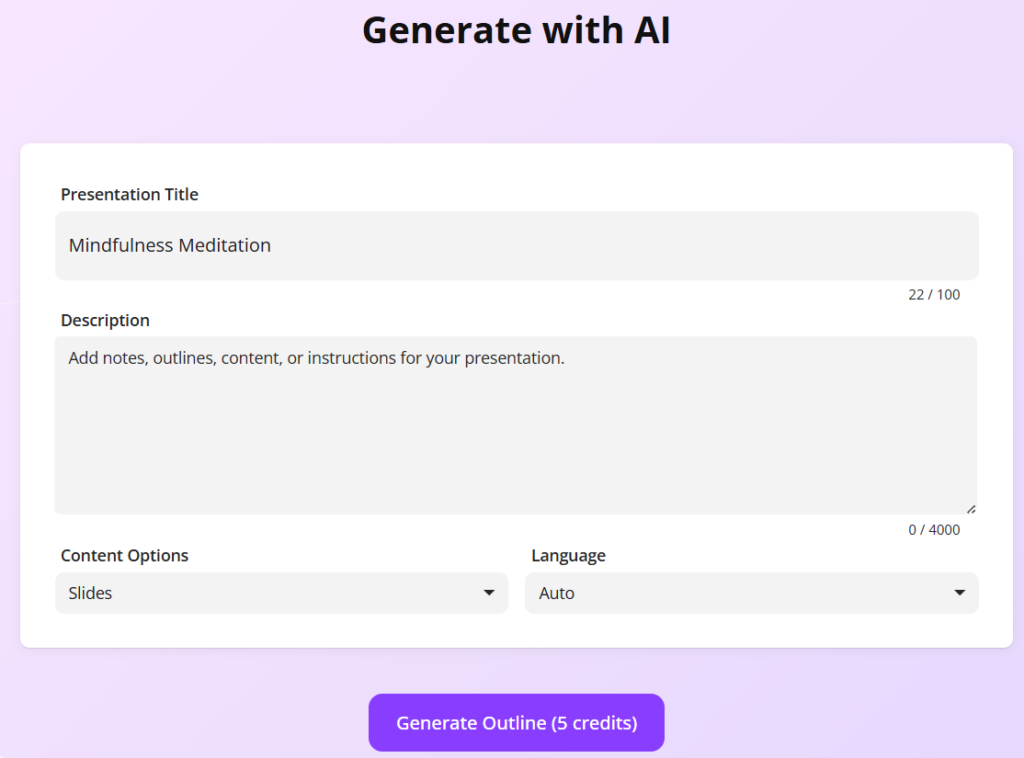
- Click Create with AI.
- Enter your lesson topic, choose whether you want to include quizzes, and customize the category, style, and language to suit your needs.

- Click Continue, and uPresenter will generate a lesson outline for you in just a few seconds.
- Edit lesson outline: Hover the mouse over each point, click to edit text. Besides, you can add, delete, reorder points, and create sub-points to structure your lesson perfectly.
- Click Continue.
- Select a template that complements your content. uPresenter offers a variety of templates to give your lesson a professional look.
- Click Continue, then wait for uPresenter to generate the lesson as settings.
Edit the Generated Lesson
You can add your personal touch to the lesson to make it more unique and personalized. uPresenter provides a range of editing tools to refine your AI-generated lesson.
- Edit the text using AI assistance: Select the text, click Ask AI, and choose a prompt or type your own.
- Edit image: Images can be regenerated or created from scratch with AI prompts.
- Edit slide elements: The left pane offers a toolbox for adding text, elements, media, questions, and even animations to make your lesson truly engaging.
Preview, Publish and Export
When everything’s done, you can click Present or press ALT + P to preview your lesson.
Once you’re happy with it, it’s time to share it!
uPresenter offers several ways to share your eLearning content.
- Click the lock icon in the top right corner to publish your lesson and generate a shareable link.
- For offline access, you can also download your lesson as a PDF file for printing. Click the Download button > File PDF.
- For LMS integration, you can also download it as an xAPI package. Click the Download button > xAPI Package.
And that’s it! Creating shareable eLearning lessons with uPresenter is quick, easy, and free.
Start exploring its AI-powered features today and share your knowledge with the world.
See more:
Best Free AI-Powered eLearning Quiz Generator 2025 – uPresenter Guide for Beginners

