Engage Audiences with Storytelling: uPresenter’s AI Storytelling Tool
In a world of endless information, capturing and maintaining your audience’s attention is no easy task. The power of storytelling can transform a dull presentation into an unforgettable experience, and adding a human-like voice through text-to-speech (TTS) technology can make it even more impactful. This is where uPresenter’s TTS feature comes in, offering you a quick, efficient way to bring a new level of engagement to your slides. With AI-powered tools, including AI storytelling tool like TTS, you can create and present captivating stories in minutes.
Why Use Text-to-Speech in Presentations?
Using voiceovers can significantly enhance audience engagement, making the presentation more immersive and less text-heavy. But recording high-quality voiceovers manually can be time-consuming and requires some technical knowledge. uPresenter’s TTS feature changes the game, allowing you to convert text to realistic speech in seconds.
This AI-driven solution brings multiple benefits:
- Enhanced Storytelling – TTS lets you narrate your slides with a dynamic voice, helping your audience better follow and retain your message.
- Greater Accessibility – Audio narration is especially helpful for audience members who may have visual impairments or prefer listening over reading.
- Flexible and Efficient – Quickly adjust text, tone, and pacing with just a few clicks, ensuring each slide is tailored for maximum impact.

Steps to Create Voice with uPresenter’s Text-to-Speech Feature
Here’s how to make the most of uPresenter’s TTS feature and create professional-quality voiceovers for your presentations in minutes.
Step 1: Access Text-to-Speech
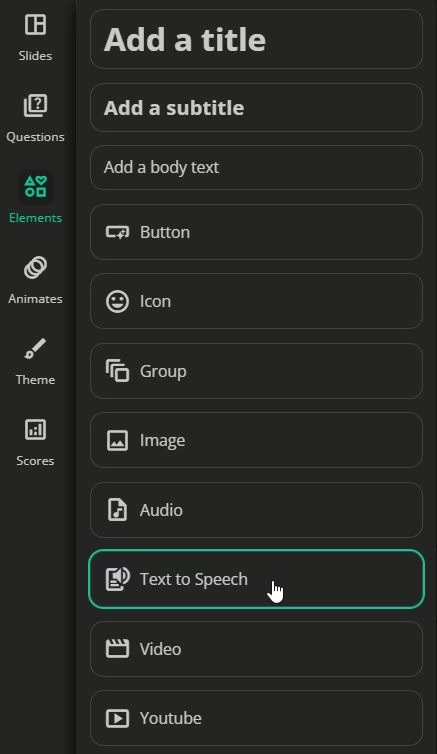
In your uPresenter editing workspace, navigate to Element > Text to Speech. This is where you’ll create and manage your slide’s voiceovers.
Step 2: Write Your Script
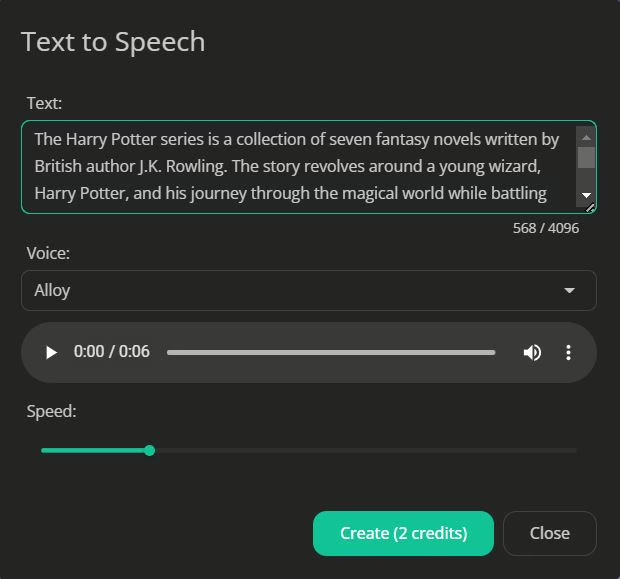
Type your text in the TTS input box. This text will be converted into the voiceover for your slide. Write a script that is concise and engaging, focusing on the key points you want to convey.
Step 3: Choose Your Voice
uPresenter offers six unique voices, each with a distinct tone and pace. You can preview each one to determine which best suits the mood of your presentation. For example:
- Professional and Clear: Ideal for business presentations or data-heavy slides.
- Friendly and Warm: Great for storytelling and more casual settings.
Step 4: Adjust Speed
Each voice comes with adjustable speed settings, allowing you to tailor the pacing to match your audience’s needs. A slower speed can be more impactful for complex topics, while a quicker pace can keep energy high during lighter content.
Step 5: Generate the Audio
Once you’ve made your selections, click Create to generate the audio. It only takes a few moments, and your voiceover will be ready for use.
Note that it’ll take 2 credits for each time generating TTS.
Control and Customize Audio Playback
- In the editing phase, there are two options for you to control how the audio playback appears on the slide. For example: toggling the Controls option to show/hide the playback.

- In the previewing phase, uPresenter doesn’t stop at just creating voiceovers – it lets you control how they’re presented during your slideshow. Here are the options available:
- Play/Pause Control – Pause and resume playback for flexible pacing.
- Adjust Volume – Modify the volume to ensure it matches any background music or complements other audio elements.
- Change Speed – Easily change the playback speed to match the mood and pacing of your presentation.
- Download the Audio File – Need the audio for other purposes or to share with collaborators? Download it with a single click.
Elevate Your Presentations with AI-Powered Storytelling
uPresenter’s TTS feature isn’t just a shortcut to creating voiceovers; it’s an AI storytelling tool that adds depth and character to your presentations. With a range of customizable settings, you can align each voiceover with your presentation’s tone, making your story more engaging and accessible.
So, next time you’re preparing a presentation, try incorporating uPresenter’s TTS feature. Not only will you save time, but you’ll also create a more polished, engaging presentation that keeps your audience tuned in from start to finish.

See Also:
The Power of AI-Driven Content Suggestions
A Guide to Craft Effective AI Prompts
uPresenter Beta Updates on Nov 1st: Inspiration Page, Social Profile, Import Document as Images, & Text to Speech
May we present the 4 new updates of uPresenter Beta since November 1st: Inspiration Page, Social Profile, Import as Document, and Text to Speech. Let’s take a closer look at each of them in turn.

Inspiration Page
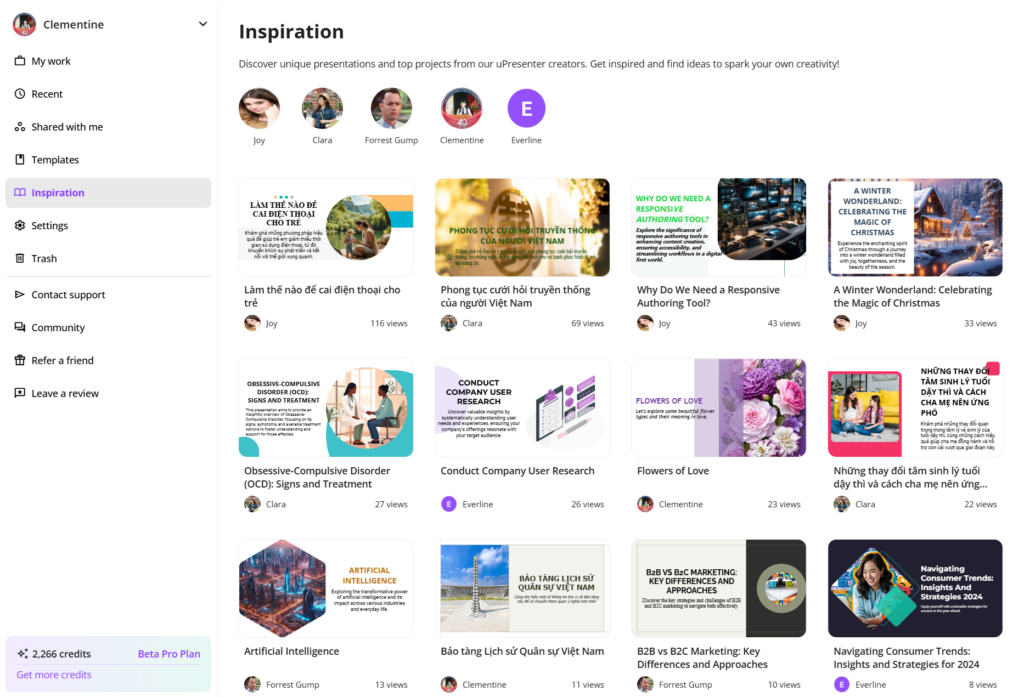
Not only can you now showcase your satisfying works with other uPresenter users on our Inspiration page. But you can also wander around to behold and refer to other creators’ great works here. This page offers intuitive browsing and sharing options. Thus, it is easier to find and be inspired by standout presentations created by other uPresenter creators.
Inspiration Page in uPresenter
- After logging in to your account, simply choose Inspiration below the option Templates.
- Take a tour around the works and click on the presentation you feel interested in.
- Use arrows to go back and forth between the slides.
- Choose the Share icon to share the presentation link on social media or other platforms.
- If users set their profile to be social, which we will go through how to set it in the upcoming part, you can also use their template directly by clicking Use as template.
Unleash your creativity now and visit our community’s work of art by signing up to uPresenter here.
Social Profile
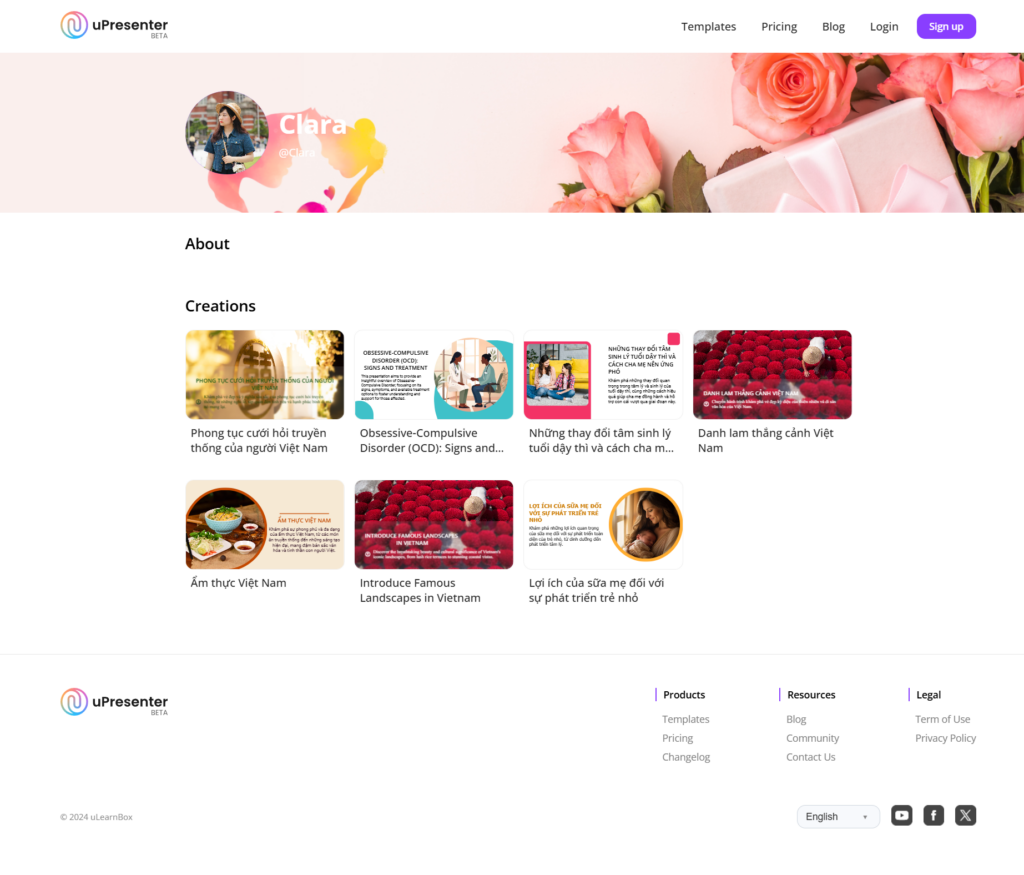
In uPresenter, you can now create your own social profile to showcase and share a page featuring your creations as a creator.
By default, no content will be displayed. Only when you select specific content to be visible upon publishing will the content appear on your social page.
A social profile in uPresenter
First, to activate your social profile, you need to log in to your account.
- Choose Settings under Inspiration.
- Slide the Activate social profile button to turn on or turn off your social profile accordingly.
- Then, customize your avatar, cover, public information (username, profile name, description), and social network links (Instagram, Facebook, Twitter, YouTube, LinkedIn).
- Click Save to save the changes for your public profile.
Don’t forget to check your Profile and My Subscription. They will help take control of your pricing plan, AI credits’ expiration date, used storage, and other information.
Then, to make each presentation appear on your social profile, follow these steps:
- After finishing designing your presentation, click on the Lock icon next to the Present icon to make changes to the access right of the presentation.
- Slide the Publish this presentation for public viewing button to make it public.
- Check the Show on Social profile & Inspiration option to make the presentation appear on your social profile and on the Inspiration page.
- Check the Allow anyone can use this presentation as a template to make the Use as Template option appear as mentioned in the first part so that viewers can use your presentation template as well.
Start building your own network right within our platform now and let the uPresenter community connect with your unique work and style.
Text to Speech
With the implementation of the text-to-speech feature, you can now transform text into natural-sounding speech and add an engaging, professional voice to your content effortlessly.
Bring your presentation to life now by following these steps:
- In your editing workspace, choose Element > Text to Speech.
- Type the text script to present that slide.
- Choose among 6 available voices by previewing their tone and speed.
- Make changes to the speed if needed.
- Then click Create.
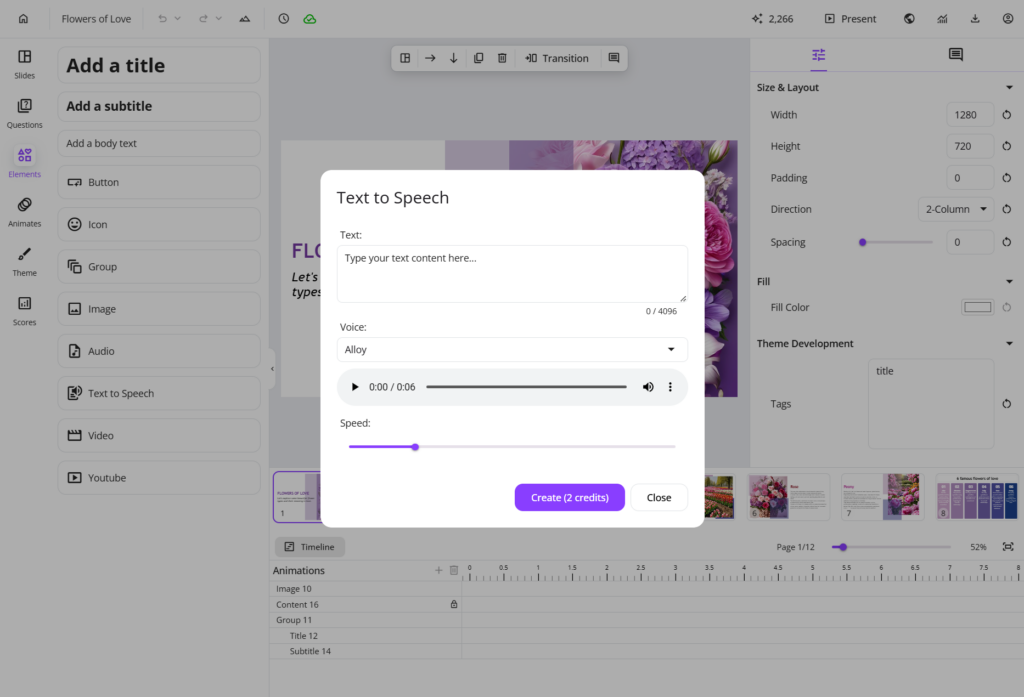
Now, when others view your presentation, they can quickly get the hang of each slide or understand the information you want to highlight in a lively way.
For more information, refer to Convert text to speech in uPresenter.
Import Document as Images
Finally, Import Document as Images is a new update to the Import Document feature.
- Now, you can choose to Import with AI from the supported documents to let AI creatively generate and create presentations from those materials.
- Or, you can choose Import as Images to keep your original content unchanged.
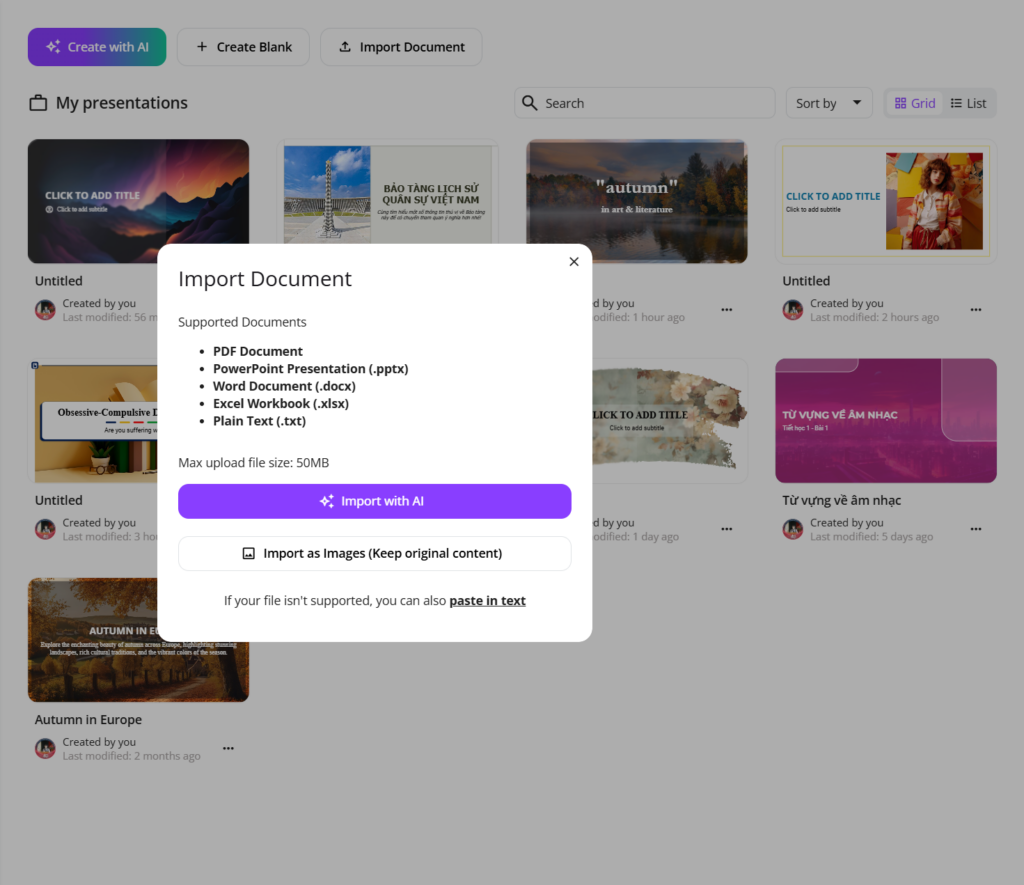
This means that each page of your imported document will be preserved as an image, keeping the original content intact.
You just need to enhance each image/ page with additional visuals or multimedia elements in uPresenter.
Have you experienced all these updates and improvements in uPresenter? Log in to your account now and give each of them a try. We still wait for more of your feedback on how each feature can be improved, so don’t hesitate to contact us at support@ulearnbox.com. And, check out our Changelog frequently to keep yourself updated, follow us on our YouTube channel, Facebook, and Community, and read more content on our Blog site. See you soon!

