
uPresenter Beta Updates on Jan 10: Support Charts & Preview on Canvas
uPresenter now supports Charts, allowing you to visualize data seamlessly. Additionally, you can preview animations and transitions directly on the Canvas, making content creation more intuitive and efficient.
Support Charts
Charts are now supported in the uPresenter editor to visualize data in your presentations. This feature helps you create engaging and data-driven presentations with ease.

- To add charts, open the Elements gallery, you can see the Chart button at the bottom in the Miscellaneous section.
- The Chart window pops up, choose from various chart types like bar, line, or pie chart, then click on the Add button.
- Change the default data to your own data in the Edit Chart Data table.
- Optionally adjust more chart properties such as title, legends, axis labels, data labels in the Properties pane on the right side.
For more information, refer to Add and Customize Charts in uPresenter.
Preview Animations & Transitions on Canvas
uPresenter makes it easy to preview animations and transitions before applying them. When selecting an effect, simply hover your mouse over each transition or animation, and a real-time preview will play directly on the Canvas.
This allows you to quickly compare effects and choose the one that best fits your presentation. With this feature, you can create smooth and engaging slide transitions more efficiently than ever.
That’s it. Be sure to visit our official website regularly to gain a deeper understanding of our product, check out the Changelog site for the latest updates, and explore our Blog for exciting news and insightful posts on AI and education.
Looking forward to seeing you again in future updates!
uPresenter Beta Updates on Nov 1st: Inspiration Page, Social Profile, Import Document as Images, & Text to Speech
May we present the 4 new updates of uPresenter Beta since November 1st: Inspiration Page, Social Profile, Import as Document, and Text to Speech. Let’s take a closer look at each of them in turn.

Inspiration Page
Not only can you now showcase your satisfying works with other uPresenter users on our Inspiration page. But you can also wander around to behold and refer to other creators’ great works here. This page offers intuitive browsing and sharing options. Thus, it is easier to find and be inspired by standout presentations created by other uPresenter creators.
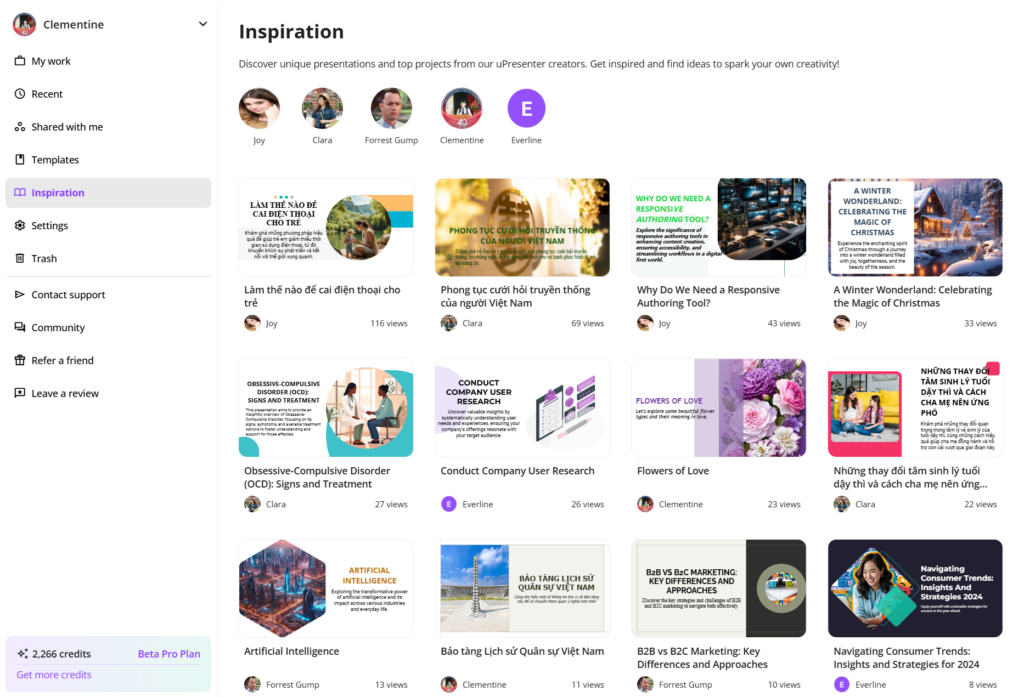
Inspiration Page in uPresenter
- After logging in to your account, simply choose Inspiration below the option Templates.
- Take a tour around the works and click on the presentation you feel interested in.
- Use arrows to go back and forth between the slides.
- Choose the Share icon to share the presentation link on social media or other platforms.
- If users set their profile to be social, which we will go through how to set it in the upcoming part, you can also use their template directly by clicking Use as template.
Unleash your creativity now and visit our community’s work of art by signing up to uPresenter here.
Social Profile
In uPresenter, you can now create your own social profile to showcase and share a page featuring your creations as a creator.
By default, no content will be displayed. Only when you select specific content to be visible upon publishing will the content appear on your social page.
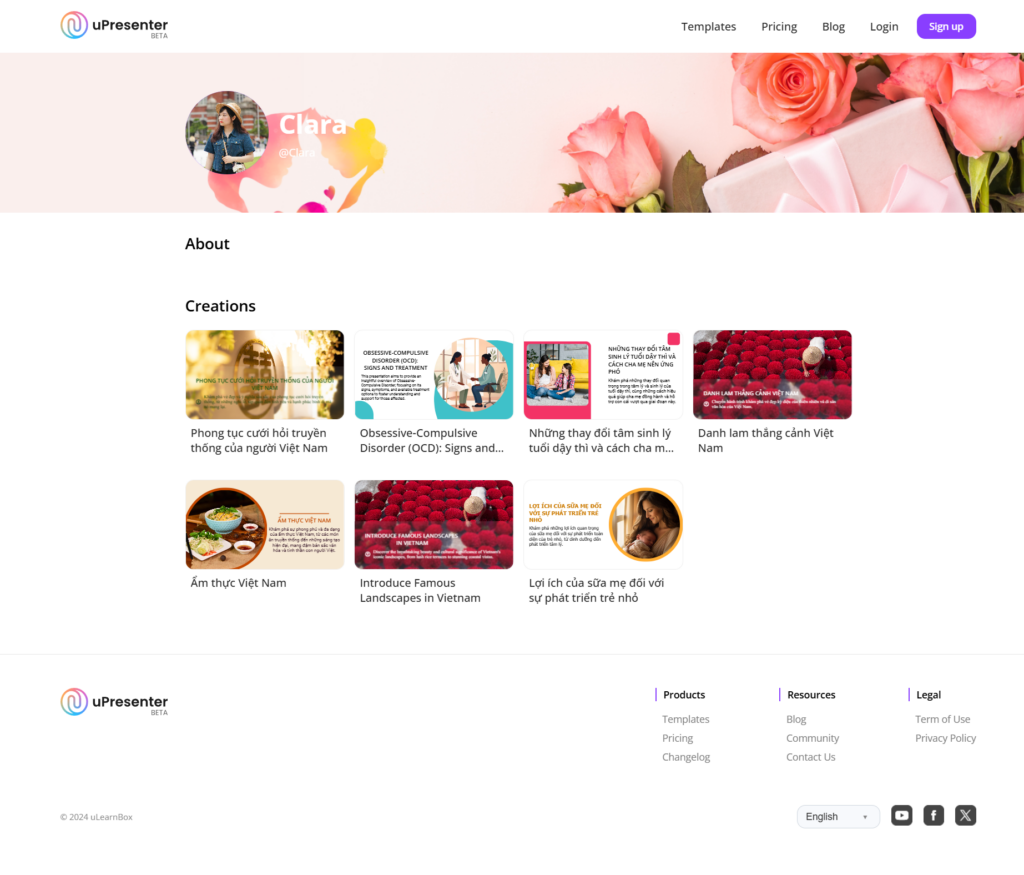
A social profile in uPresenter
First, to activate your social profile, you need to log in to your account.
- Choose Settings under Inspiration.
- Slide the Activate social profile button to turn on or turn off your social profile accordingly.
- Then, customize your avatar, cover, public information (username, profile name, description), and social network links (Instagram, Facebook, Twitter, YouTube, LinkedIn).
- Click Save to save the changes for your public profile.
Don’t forget to check your Profile and My Subscription. They will help take control of your pricing plan, AI credits’ expiration date, used storage, and other information.
Then, to make each presentation appear on your social profile, follow these steps:
- After finishing designing your presentation, click on the Lock icon next to the Present icon to make changes to the access right of the presentation.
- Slide the Publish this presentation for public viewing button to make it public.
- Check the Show on Social profile & Inspiration option to make the presentation appear on your social profile and on the Inspiration page.
- Check the Allow anyone can use this presentation as a template to make the Use as Template option appear as mentioned in the first part so that viewers can use your presentation template as well.
Start building your own network right within our platform now and let the uPresenter community connect with your unique work and style.
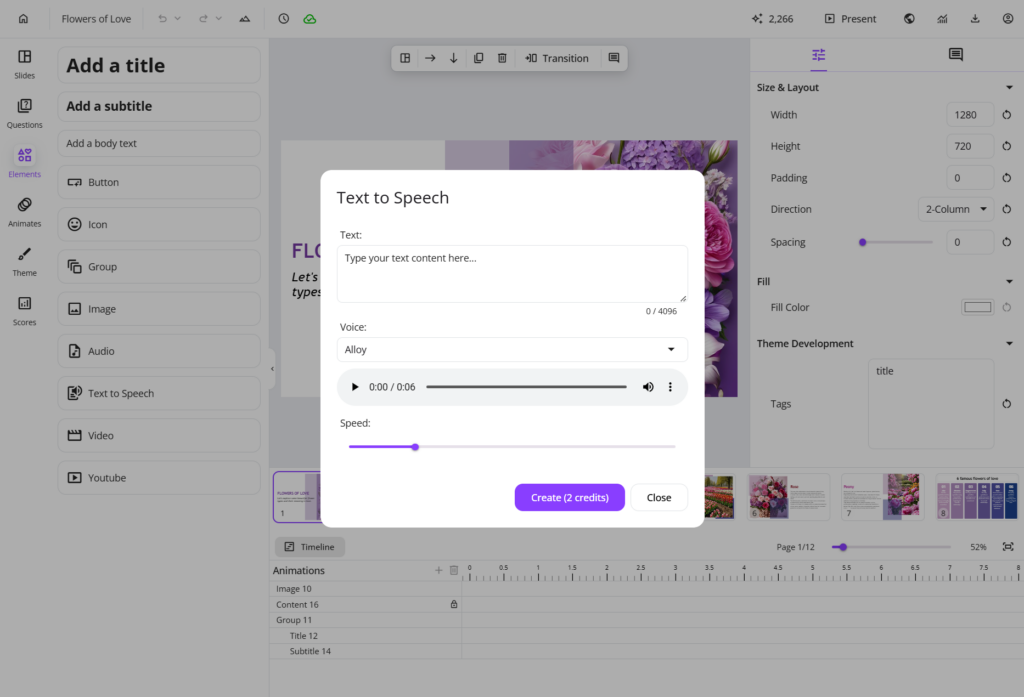
Text to Speech
With the implementation of the text-to-speech feature, you can now transform text into natural-sounding speech and add an engaging, professional voice to your content effortlessly.
Bring your presentation to life now by following these steps:
- In your editing workspace, choose Element > Text to Speech.
- Type the text script to present that slide.
- Choose among 6 available voices by previewing their tone and speed.
- Make changes to the speed if needed.
- Then click Create.
Now, when others view your presentation, they can quickly get the hang of each slide or understand the information you want to highlight in a lively way.
For more information, refer to Convert text to speech in uPresenter.
Import Document as Images
Finally, Import Document as Images is a new update to the Import Document feature.
- Now, you can choose to Import with AI from the supported documents to let AI creatively generate and create presentations from those materials.
- Or, you can choose Import as Images to keep your original content unchanged.
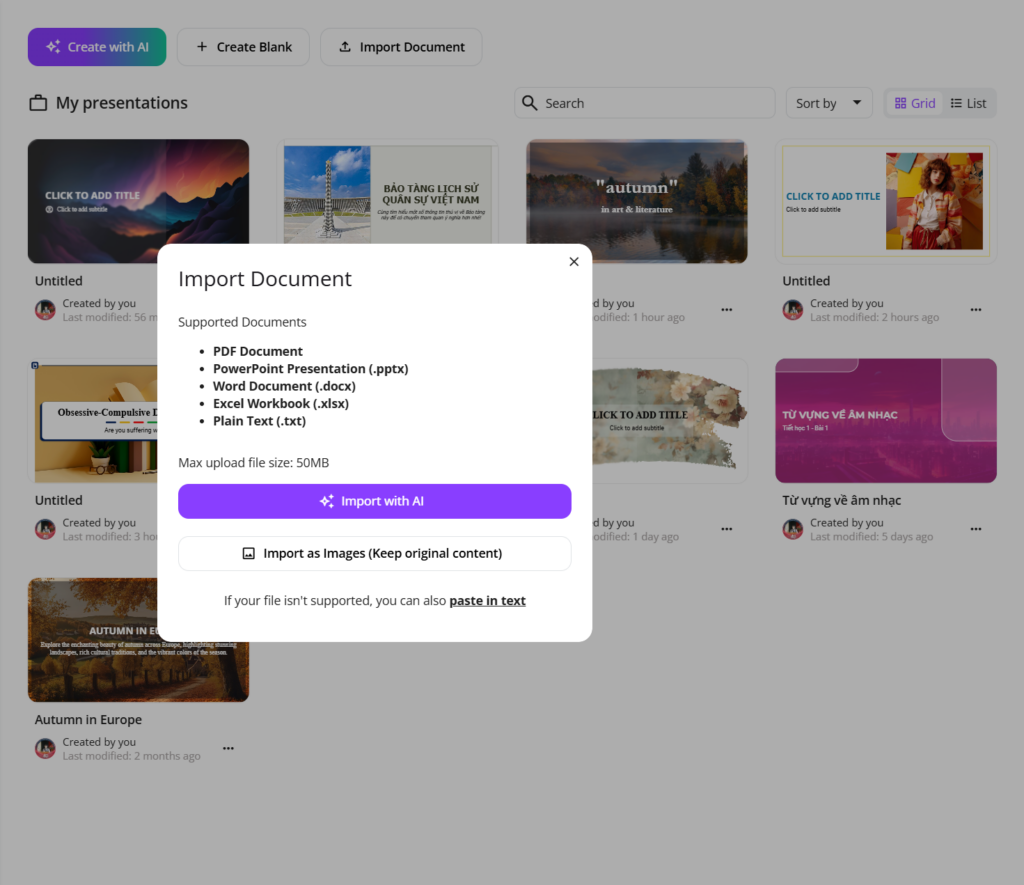
This means that each page of your imported document will be preserved as an image, keeping the original content intact.
You just need to enhance each image/ page with additional visuals or multimedia elements in uPresenter.
Have you experienced all these updates and improvements in uPresenter? Log in to your account now and give each of them a try. We still wait for more of your feedback on how each feature can be improved, so don’t hesitate to contact us at support@ulearnbox.com. And, check out our Changelog frequently to keep yourself updated, follow us on our YouTube channel, Facebook, and Community, and read more content on our Blog site. See you soon!